> ## Documentation Index
> Fetch the complete documentation index at: https://docs.qodo.ai/llms.txt
> Use this file to discover all available pages before exploring further.
# Configure Single sign-on (SSO)
> Configure single sign-on for your Qodo organization, including identity provider setup, SP-initiated and IdP-initiated login, and enforcement.
Enterprise
Also available on paid plans for an additional cost. [Contact Qodo](https://www.qodo.ai/contact/) for more information.
This guide explains how to configure Single Sign-On (SSO) for your Qodo organization. By enabling SSO, you simplify authentication, reduce the need to manage multiple user accounts and passwords, and centralize access across your organization. This improves security while providing users with a seamless sign-in experience using a single set of credentials.
## Prerequisites
Before configuring SSO, make sure you have:
* A Qodo user account with **admin privileges**.
* An **Enterprise license** for Qodo.
* **Administrator access** to your identity provider.
* **Qodo avatar**: Download if your identity provider requires an app logo during setup. Download ↓
## Step 1: Access organization settings
Log in to your Qodo account as an administrator.
Navigate to the [**Users**](https://app.qodo.ai/account/users-management) page.
## Step 2: Initiate SSO configuration
In the top right corner on the **Users** page:
Click the More actions (...) menu in the upper-right corner.
Select **Manage SSO**
 The **Manage SSO** option is only visible to admins with an Enterprise license.
## Step 3: Select your identity provider
Select one of the supported identity providers.
* **ADP OpenID Connect**: Workforce identity and HR-integrated authentication
* **Auth0 SAML**: Flexible authentication and identity platform
* **CAS SAML**: Central Authentication Service for single sign-on
* **ClassLink SAML**: Education-focused SSO platform
* **Clever OpenID Connect**: Identity platform for education organizations
* **Cloudflare SAML**: Zero Trust access and identity integration
* **CyberArk SAML**: Privileged access and identity security
* **Duo SAML**: Multi-factor authentication and access security
* **Entra ID (Azure AD) OpenID Connect**: Microsoft identity platform using OIDC
* **Entra ID (Azure AD) SAML**: Microsoft’s cloud-based identity service
* **Google OpenID Connect**: Google Workspace authentication using OIDC
* **Google SAML**: Google Workspace SAML-based SSO
* **JumpCloud SAML**: Cloud directory and device management
* **Keycloak SAML**: Open-source identity and access management
* **LastPass SAML**: Identity and password management SSO
* **Login.gov OpenID Connect**: U.S. government identity provider
* **Microsoft AD FS**: On-premises Active Directory Federation Services
* **miniOrange SAML**: Identity and access management platform
* **NetIQ SAML**: Enterprise identity and access management
* **Okta OpenID Connect**: Okta authentication using OIDC
* **Okta SAML**: Enterprise identity and access management
* **OneLogin**: Cloud-based identity and access management
* **Oracle**: Oracle Identity and Access Management SSO
* **PingFederate**: Enterprise federation and SSO solution
* **PingOne**: Cloud identity platform by Ping Identity
* **Rippling**: Workforce management with integrated SSO
* **Salesforce**: CRM-based identity provider and SSO
* **Shibboleth**: Open-source federated identity solution
* **Shibboleth Generic SAML**: Generic SAML configuration for Shibboleth
* **SimpleSAMLphp SAML**: PHP-based SAML identity provider
* **VMware Workspace ONE**: Unified endpoint and identity management
* **Custom SAML**: Generic SAML 2.0 configuration for unsupported providers
The **Manage SSO** option is only visible to admins with an Enterprise license.
## Step 3: Select your identity provider
Select one of the supported identity providers.
* **ADP OpenID Connect**: Workforce identity and HR-integrated authentication
* **Auth0 SAML**: Flexible authentication and identity platform
* **CAS SAML**: Central Authentication Service for single sign-on
* **ClassLink SAML**: Education-focused SSO platform
* **Clever OpenID Connect**: Identity platform for education organizations
* **Cloudflare SAML**: Zero Trust access and identity integration
* **CyberArk SAML**: Privileged access and identity security
* **Duo SAML**: Multi-factor authentication and access security
* **Entra ID (Azure AD) OpenID Connect**: Microsoft identity platform using OIDC
* **Entra ID (Azure AD) SAML**: Microsoft’s cloud-based identity service
* **Google OpenID Connect**: Google Workspace authentication using OIDC
* **Google SAML**: Google Workspace SAML-based SSO
* **JumpCloud SAML**: Cloud directory and device management
* **Keycloak SAML**: Open-source identity and access management
* **LastPass SAML**: Identity and password management SSO
* **Login.gov OpenID Connect**: U.S. government identity provider
* **Microsoft AD FS**: On-premises Active Directory Federation Services
* **miniOrange SAML**: Identity and access management platform
* **NetIQ SAML**: Enterprise identity and access management
* **Okta OpenID Connect**: Okta authentication using OIDC
* **Okta SAML**: Enterprise identity and access management
* **OneLogin**: Cloud-based identity and access management
* **Oracle**: Oracle Identity and Access Management SSO
* **PingFederate**: Enterprise federation and SSO solution
* **PingOne**: Cloud identity platform by Ping Identity
* **Rippling**: Workforce management with integrated SSO
* **Salesforce**: CRM-based identity provider and SSO
* **Shibboleth**: Open-source federated identity solution
* **Shibboleth Generic SAML**: Generic SAML configuration for Shibboleth
* **SimpleSAMLphp SAML**: PHP-based SAML identity provider
* **VMware Workspace ONE**: Unified endpoint and identity management
* **Custom SAML**: Generic SAML 2.0 configuration for unsupported providers
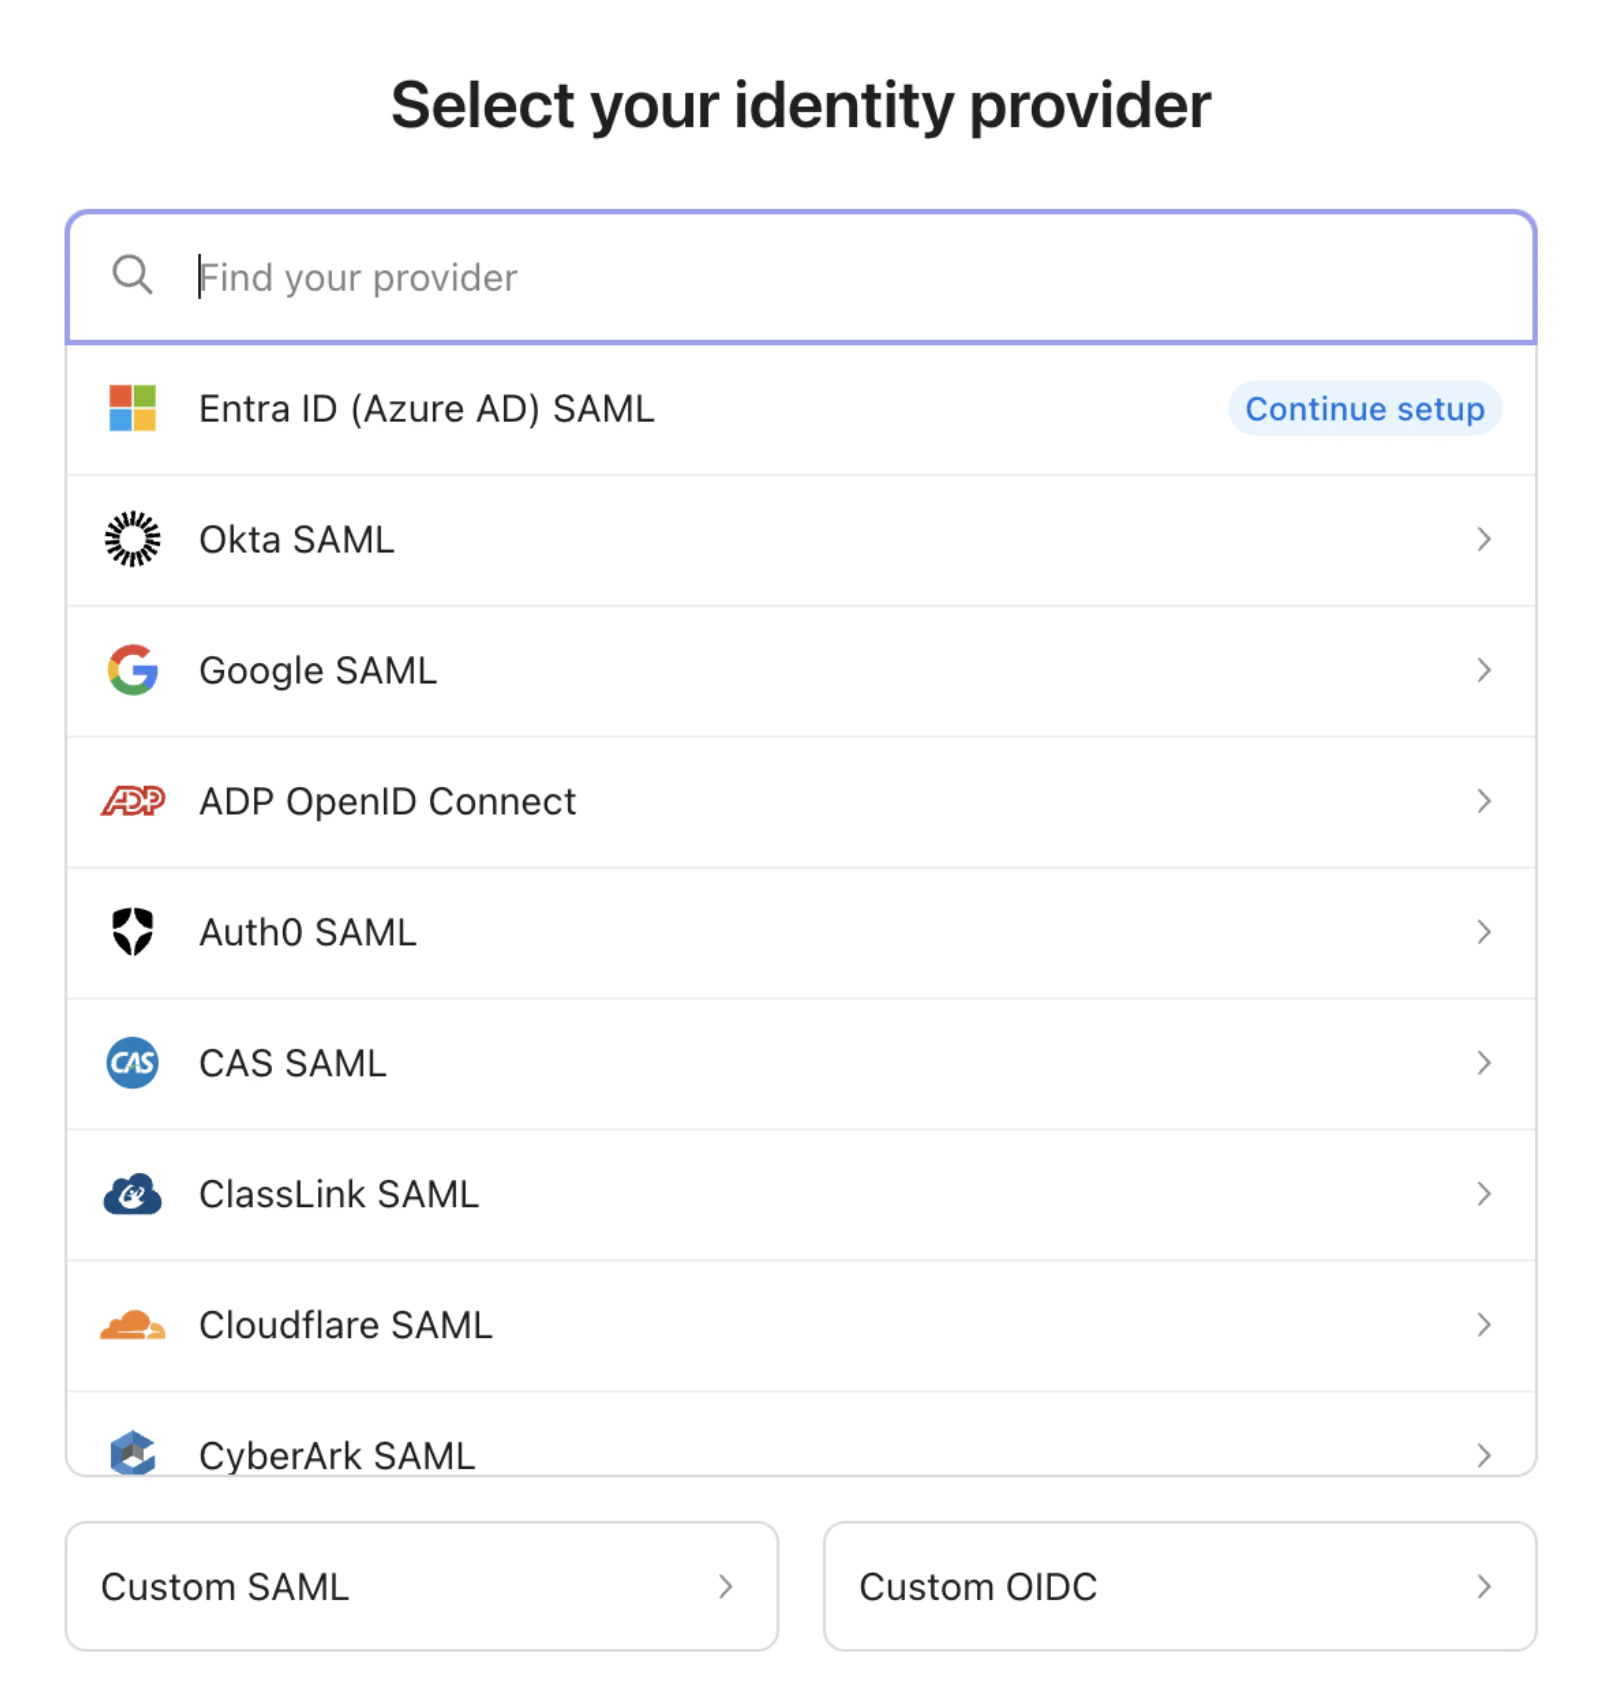 After you select an identity provider, Qodo redirects you to the WorkOS Admin Portal to complete the provider-specific configuration.
## Step 4: Complete the identity provider configuration
The WorkOS Admin Portal provides step-by-step instructions for configuring your selected identity provider. Follow the prompts to establish the trust relationship between Qodo and your identity provider.
After you complete the configuration, return to the Qodo portal to continue the SSO setup.
## Step 5: Set the login method
After selecting your identity provider, choose how users will authenticate with Qodo.
* **SP-initiated login**
Users begin authentication from the Qodo login page (app.qodo.ai). Qodo redirects them to the configured identity provider for authentication before returning them to Qodo.
* **IdP-initiated login**
Users begin authentication from their identity provider portal by launching the Qodo application (for example, selecting the Qodo application tile in Okta or Microsoft Entra ID).
Follow the provider-specific instructions to configure IdP-initiated login.
Once SSO is configured for your organization, it is enforced by default. After enforcement, users must authenticate using the configured identity provider, and other authentication methods (such as Google sign-in) cannot be used in parallel.
## Example: Configure Entra ID (Azure AD)
This section provides an example of connecting Qodo to Azure AD. Follow the **in-product instructions** for complete and up-to-date steps.
**Step 1: Create an enterprise application**
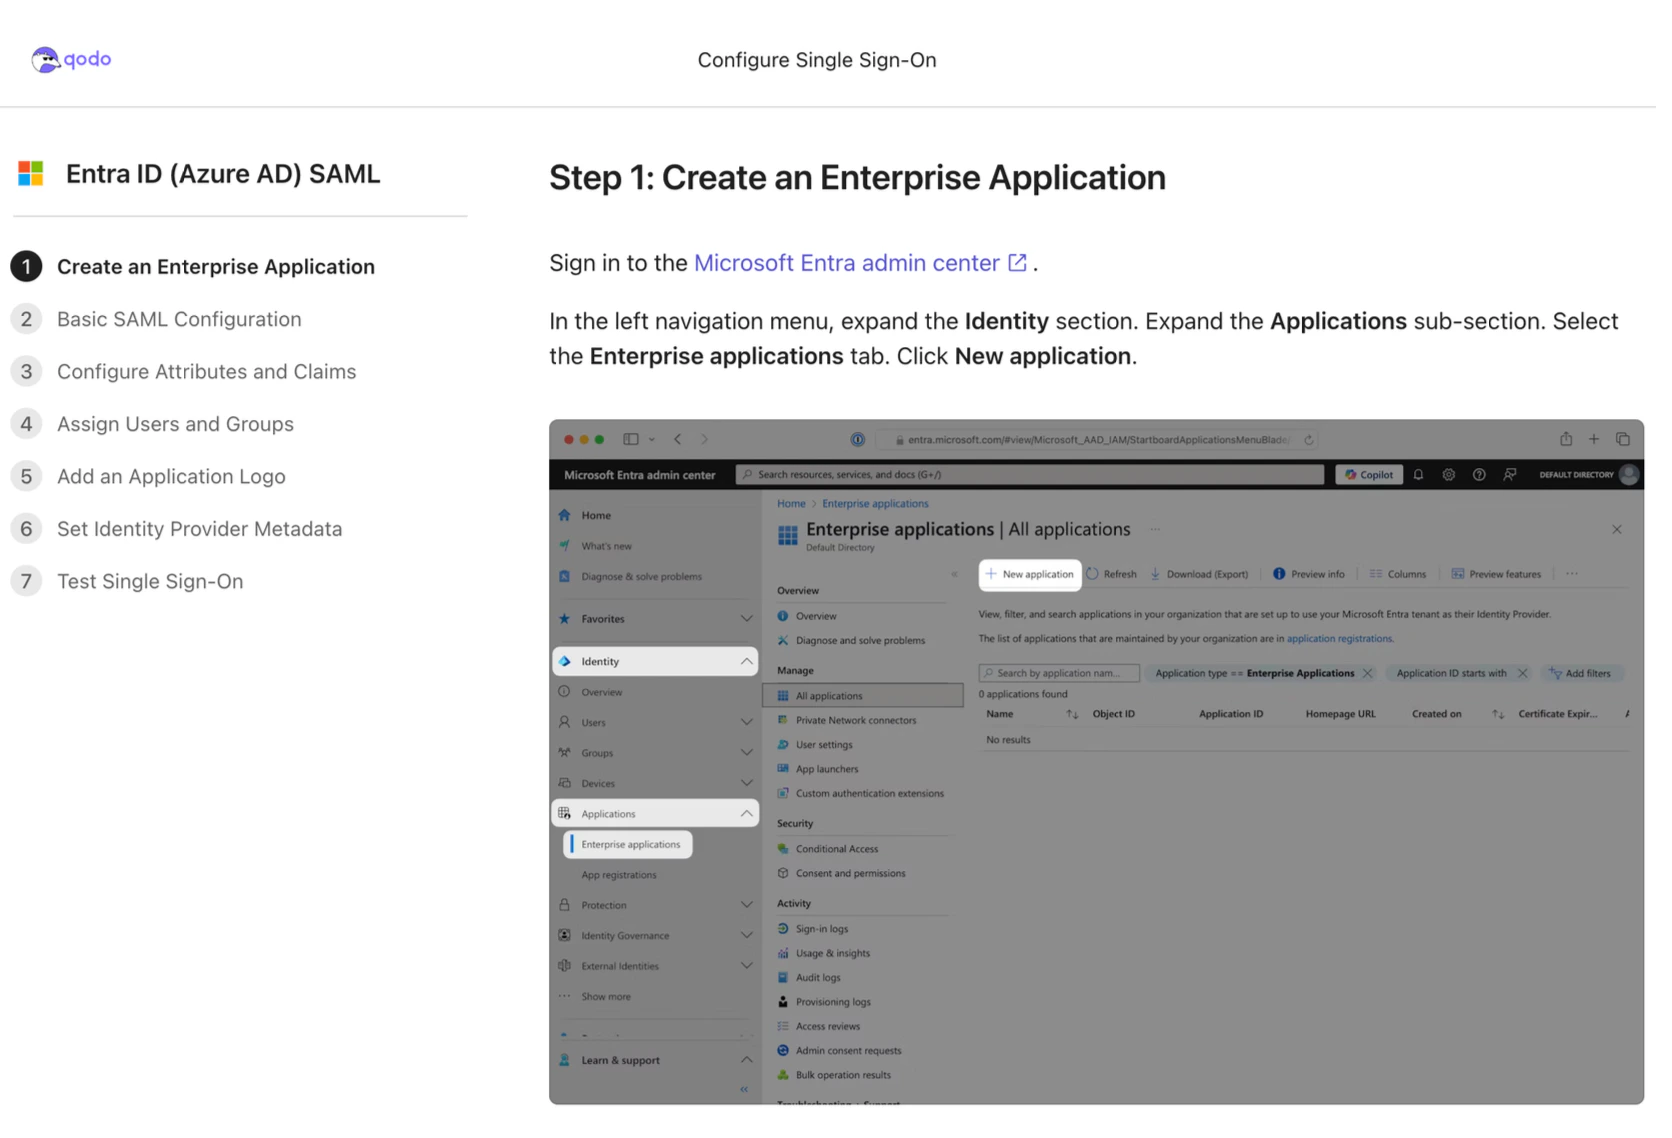
As part of the WorkOS Admin Portal configuration in Step 4, you'll create and configure an enterprise application in Entra ID to establish the connection with Qodo. Follow the in-product prompts to complete this setup.
**Required Access**: You must have administrator access to your Microsoft Entra admin center to complete these steps.
After you select an identity provider, Qodo redirects you to the WorkOS Admin Portal to complete the provider-specific configuration.
## Step 4: Complete the identity provider configuration
The WorkOS Admin Portal provides step-by-step instructions for configuring your selected identity provider. Follow the prompts to establish the trust relationship between Qodo and your identity provider.
After you complete the configuration, return to the Qodo portal to continue the SSO setup.
## Step 5: Set the login method
After selecting your identity provider, choose how users will authenticate with Qodo.
* **SP-initiated login**
Users begin authentication from the Qodo login page (app.qodo.ai). Qodo redirects them to the configured identity provider for authentication before returning them to Qodo.
* **IdP-initiated login**
Users begin authentication from their identity provider portal by launching the Qodo application (for example, selecting the Qodo application tile in Okta or Microsoft Entra ID).
Follow the provider-specific instructions to configure IdP-initiated login.
Once SSO is configured for your organization, it is enforced by default. After enforcement, users must authenticate using the configured identity provider, and other authentication methods (such as Google sign-in) cannot be used in parallel.
## Example: Configure Entra ID (Azure AD)
This section provides an example of connecting Qodo to Azure AD. Follow the **in-product instructions** for complete and up-to-date steps.
**Step 1: Create an enterprise application**
As part of the WorkOS Admin Portal configuration in Step 4, you'll create and configure an enterprise application in Entra ID to establish the connection with Qodo. Follow the in-product prompts to complete this setup.
**Required Access**: You must have administrator access to your Microsoft Entra admin center to complete these steps.
 **Step 2: Verify the SSO connection**
After completing the provider-specific setup:
* **Test the connection**: Verify SSO using a test user
* **Assign users**: Add team members to the SSO application
* **Confirm enforcement**: SSO is automatically enforced and becomes the only supported authentication method for the organization
## Troubleshooting
If you encounter issues, check the following:
* Configuration: Ensure all URLs and endpoints are correctly configured in both Qodo and your identity provider.
* User mapping: Verify that user email addresses match between Qodo and your identity provider.
* Token/SAML assertions: Confirm that the SAML assertion or OIDC token contains the required user attributes.
* User access: Verify that users are assigned to the Qodo application in your identity provider.
* SP-initiated login: If SP-initiated login fails, verify that users are starting authentication from the Qodo login page.
* IdP-initiated login: If IdP-initiated login fails, verify that the Qodo application is correctly configured in your identity provider and that users are launching the application from their identity provider portal.
## Support
If issues persist:
* Review the provider-specific documentation.
* Contact your identity provider's support team for provider-side issues.
* Reach out to Qodo support for application-specific questions.
**Step 2: Verify the SSO connection**
After completing the provider-specific setup:
* **Test the connection**: Verify SSO using a test user
* **Assign users**: Add team members to the SSO application
* **Confirm enforcement**: SSO is automatically enforced and becomes the only supported authentication method for the organization
## Troubleshooting
If you encounter issues, check the following:
* Configuration: Ensure all URLs and endpoints are correctly configured in both Qodo and your identity provider.
* User mapping: Verify that user email addresses match between Qodo and your identity provider.
* Token/SAML assertions: Confirm that the SAML assertion or OIDC token contains the required user attributes.
* User access: Verify that users are assigned to the Qodo application in your identity provider.
* SP-initiated login: If SP-initiated login fails, verify that users are starting authentication from the Qodo login page.
* IdP-initiated login: If IdP-initiated login fails, verify that the Qodo application is correctly configured in your identity provider and that users are launching the application from their identity provider portal.
## Support
If issues persist:
* Review the provider-specific documentation.
* Contact your identity provider's support team for provider-side issues.
* Reach out to Qodo support for application-specific questions.